How to Perform Office 365 Tenant to Tenant Migration? Step by Step Guided Solution


In an Organisation, Office 365 suite is one of the most valuable platforms and provides services to maintain the continuity of the work. Although Office 365 is Software as Service (SAAS). There are many organizations that move to Office 365. Apart from this, at the time of a business merger, most of the organizations want to perform Office 365 tenant to tenant migration.
But due to the unavailability of the Office 365 migration method, this task becomes more complicated. So in this article, we will describe the procedure to migrate Office 365 Tenant mailbox to another Tenant, let’s start!
Table Of Content
User Query –
“My company using Office 365 for all business-related work. Last year we acquired a company that also using Office 365 tenants, now we are having two Office 365 tenants. Due to business requirements, we need to Migrate mailboxes from Office 365 Tenant (acquired company) to our tenant. Therefore, in this situation, I want to know the reliable solution to migrate O365 tenant to another“
This is the most common scenario of businesses nowadays! you will get the solution to perform this task. So continue the reading.
Pre-Migration Activities before Migrating from One O365 Tenant to Another
With follow the given method, you can perform this migration. Follow the steps for Office 365 Tenant migration. First, you have to understand there is no manual solution to perform this task, we have to use an automated solution to perform this task. But before using the tool we have to make a plan & make some changes. Follow the given steps before starting the migration.
Some Client Considerations
- If using Outlook 2010 & 2013: Delete the account of Microsoft Outlook
- For Outlook 2007 & 2010: When restarting, the client will configure by auto-discover & creating the OST file once again
- For the Lync Clients: Once the merging is completed, add all contacts.
Preparation & Licensing of Domain
- There is a need to increase the licensing in the target tenant of Office 365. It is required that’s why the mailbox of the source tenant can be merged to the target tenant.
- Create the account of all Admins in both target and source tenants as well. It is useful during the merging of two tenants of Office 365.
Interaction with End-users
In an Organisation, to interact for migration to the end-users, they must prepare themselves with the below-discussed method:
- Creating an interaction plan and initiate the notification of Microsoft Office 365 tenant to tenant migration and few changes in service.
- Once the migration is finished, the nickname cache must be cleared out on the MS Outlook application.
- Inform the user about the complete process for connecting to Outlook Web App using all required log in details in case of any issue after moving the process
Tenant Preparation Before O365 Tenant Migration
Go through the following steps to prepare the domain as follows:
- Need to initiate the verification of domain on the targeted tenant that is for source email tenant.
- Under the target Office 365 admin center, add source domain and create TXT records in DNS( Domain Name System) for verification.
Remember: One domain is still in use in another tenant then, the verification gets fail
- After performing such steps, the users allow the DNS record time for circulation. This process will take around 72 hours.
Migration Scheduling
- The users have to generate a master list of user mailboxes that are needed to migrate.
- After that, create the mailbox mapping.
Time to live Test Mail Exchanger Record & Disable the Directory Sync in Source Domain
Target Domain Preparation –
It contains the complete verification of the source tenant in the target domain. You have to wait for 1 hour once to remove the domain from an existing domain.
- When using AD FS, the users have to configure a new domain in the target tenant for AD FS
- Start the activation of the target domain and assign all licenses to a new account of end-user
- Set up the source domain as the primary email address
- Enter the password on each mailbox in the target domain, if users are not accessing AD FS or password sync feature.
- Check testing of mail flow to or from the new mailboxes in the target domain.
Source tenant preparation –
Before performing Microsoft 365 Tenant migration or to the target domain, the primary mail domain should be erased from all objects in the source tenant
- If to configure SharePoint Online site, initially to set the URL of all website’s back to the primary domain
- Eliminate all the licenses of Lync in source tenant by using the Lync admin portal
- Once again to set the default email id on the mailbox of the source domain and reset the whole email addresses on all Rooms, Resources, and Distribution Lists to an initial domain in the source tenant.
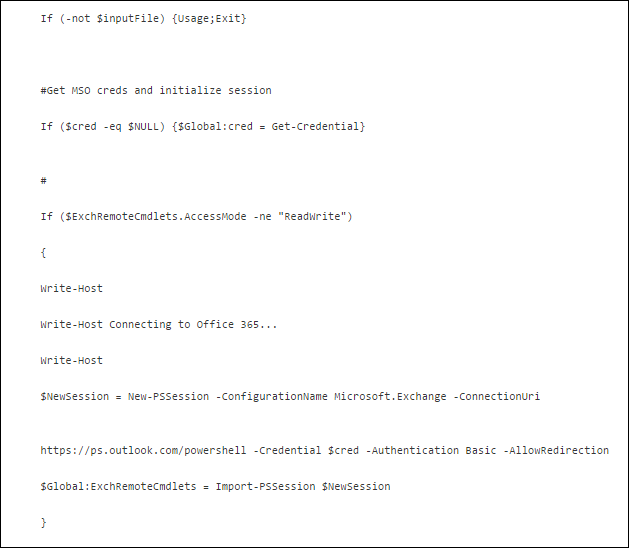
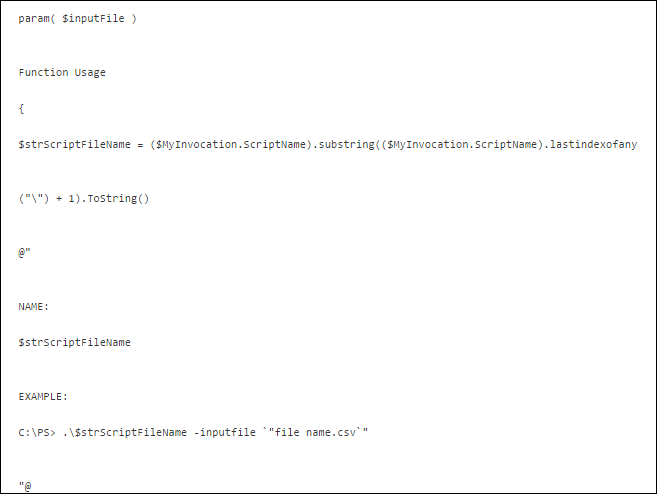
Here, run the PowerShell commands for merging the entire process:
Reset MS Office 365 Bulk Password For Office 365 ( Microsoft 365) Tenant to Tenant Migration
- In the first step, create the CSV file with the name of password.csv.
- Afterward, place “upn” and “newpassword” columns in the created file (for example uvw@org.com,Password2)
- Run the sample script of Windows PowerShell:

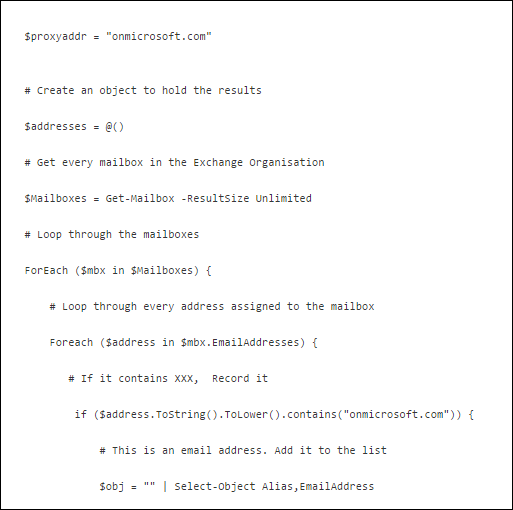
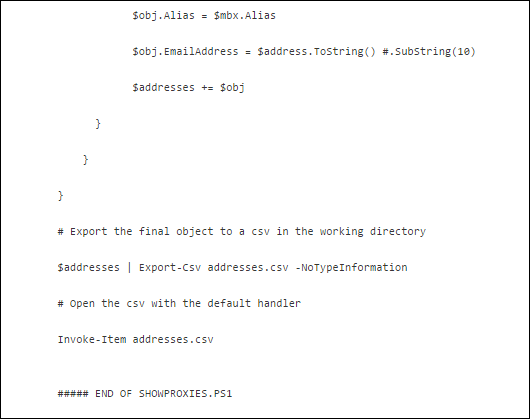
Copy all emails from Office 365 account with specific types of proxy addresses into .csv file

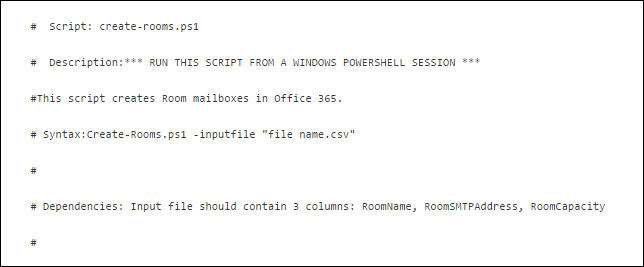
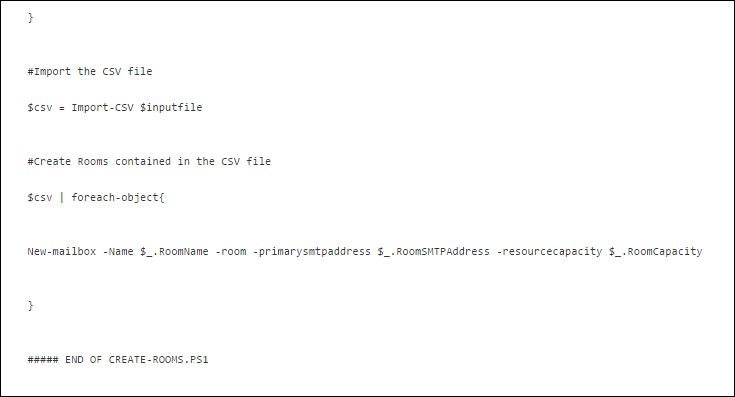
Creating the Room Mailboxes in Office 365
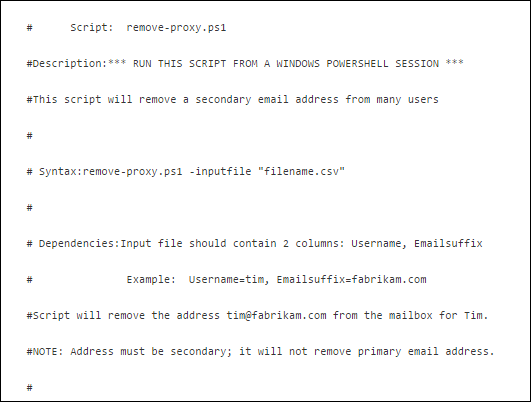
Bulk Remove Secondary Email Address Domain from all Mailboxes

Recommended Way to Execute Office 365 Tenant to Tenant Migration
It is suggested to opt for a trouble-free automated tool to perform this operation. The name of such utility is Office 365 to Office 365 migration Tool. Using this utility, it becomes really easy to migrate Office 365 Tenant user mailboxes to Tenant.
Also, it keeps the duplicate email messages away. The software is compatible with all the Windows machines and keeps all the data intact while migrating from one Office 365 tenant to another.
With this software, you will perform the migration of emails, contacts, calendars, documents of all user mailboxes.
Download the tool here:
Great Features of the Software to Ensure a Succesful Data Migration
1. Tool performs tenant to tenant migration in Office 365 with emails, contacts, calendars, and documents data.
2. Support Office 365 tenant domain user’s mailbox migration.
3. Provides date-based filter option for email, contact, calendar, document to move selective data.
4. Provides account-based priority to set account priority to migrate first.
5. Import CSV option available to create a mapping between source & destination tenant users.
6. Three types of Re-Run migration options – 1: Delta Migration, 2: Retry Failed Items, 3: Re-Run Full Migration.
7. Selective users & entire Office 365 tenant users data migration.
Also Read: Guide to Migrate Mailboxes from One Office 365 Tenant to Another
Software Steps to Perform O365 Tenant Migration Safely
Step 1. Install & run the tool and select Office 365 as a source & as a destination.
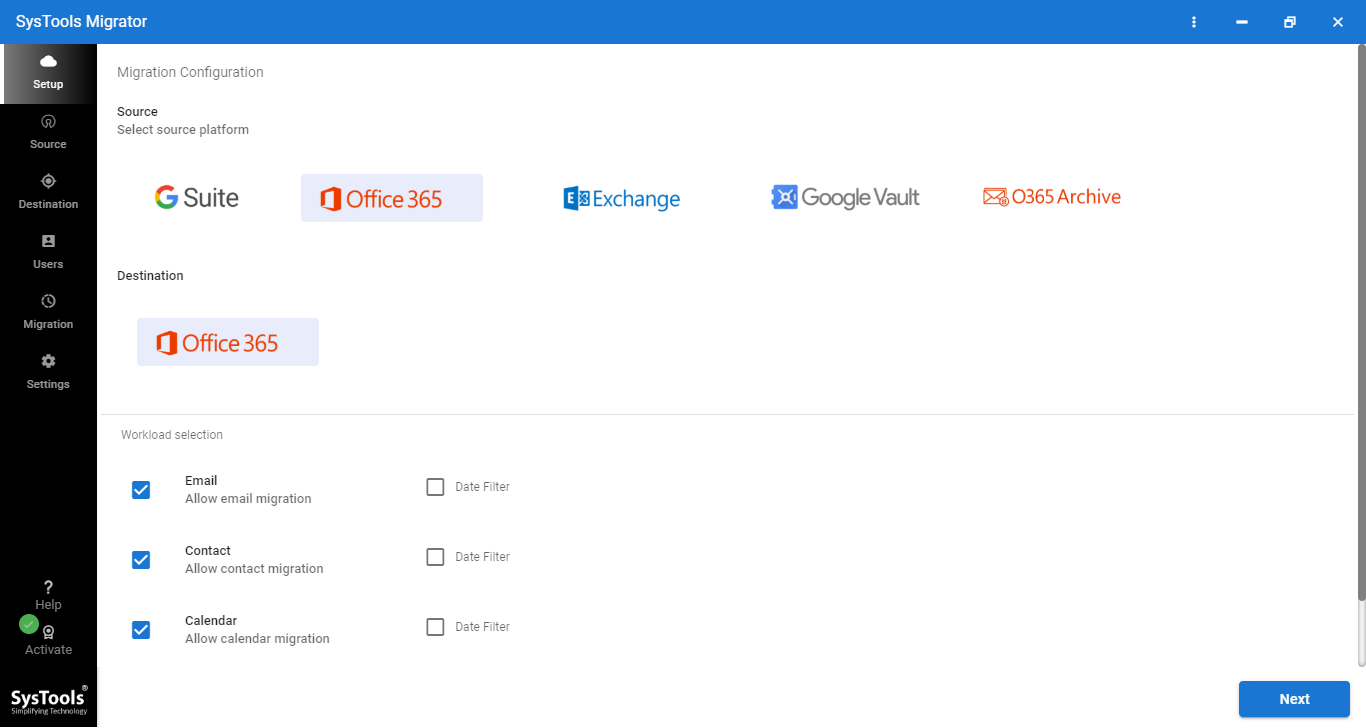
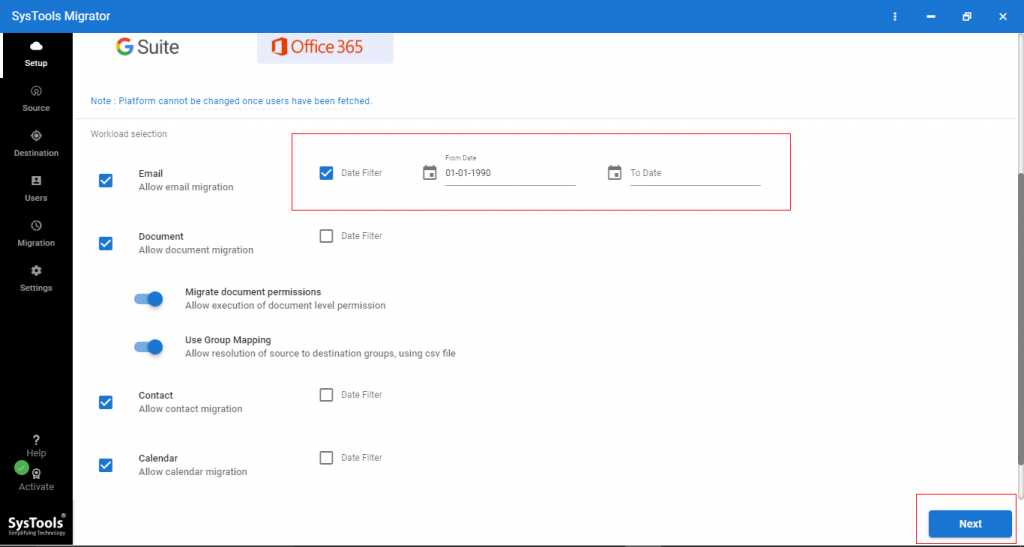
Step 2. Now, select items (emails, contacts, calendars, documents) from the workload selection section.
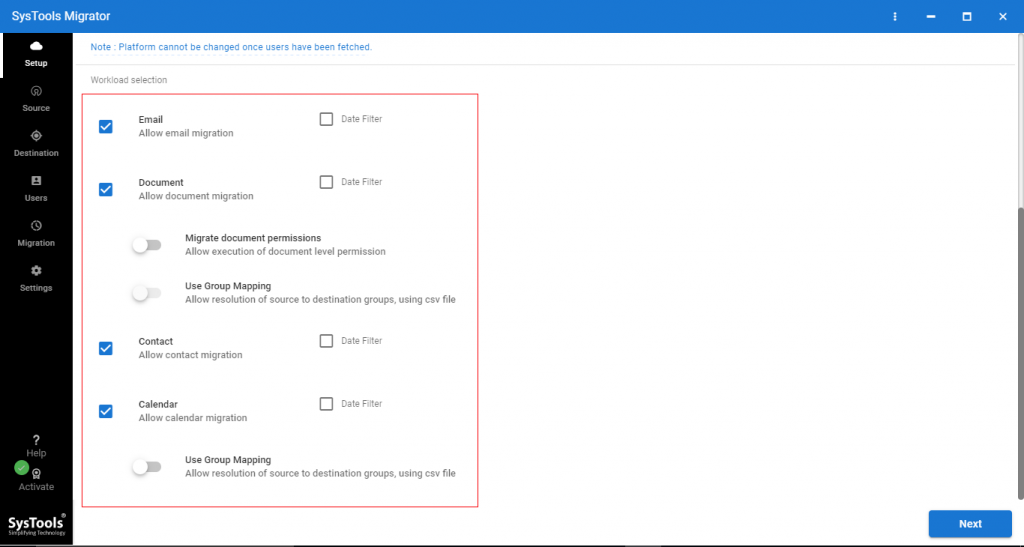
Step 3. On the same screen, you can apply a Date-based filter to migrate selective data, and enable migrate Document Permission, Use Group Mapping. After applying options click on Next to perform Office 365 tenant to tenant migration.
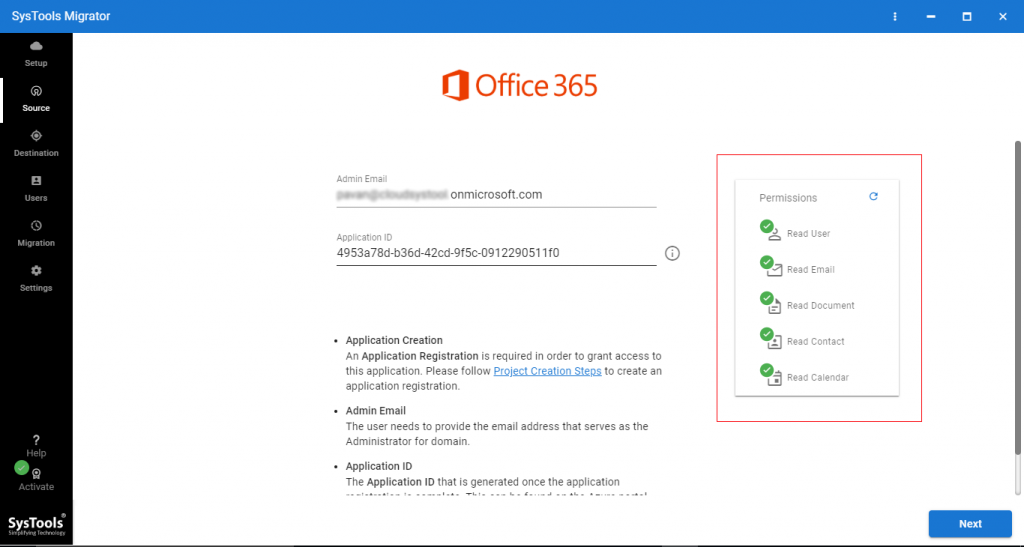
Step 4. Now, enter the Admin ID & application ID of the Office 365 source tenant, then click on the Validate button to validate permissions.

Step 5. Now, after validating permissions click on Next to perform Microsoft O365 tenant to tenant migration.
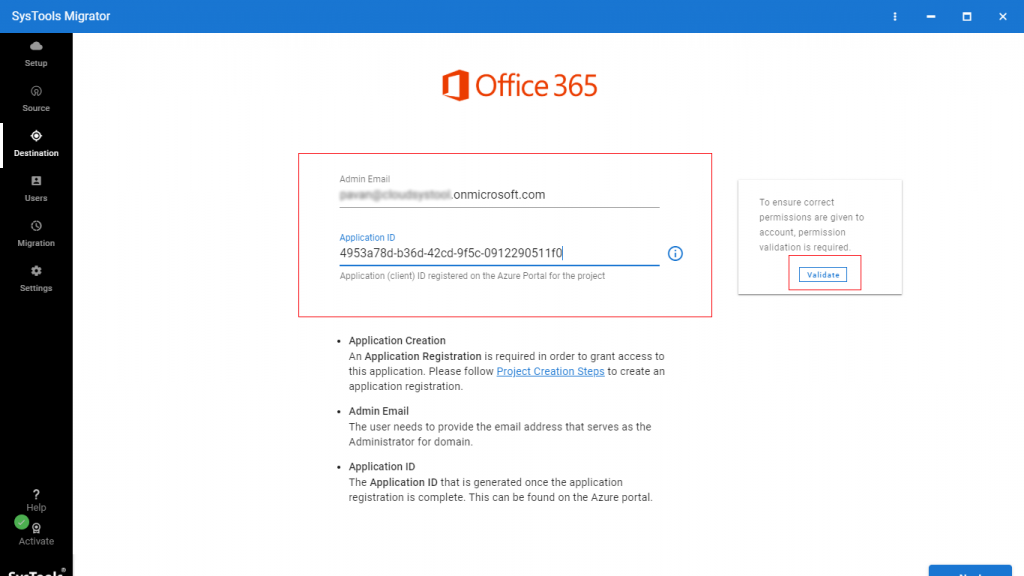
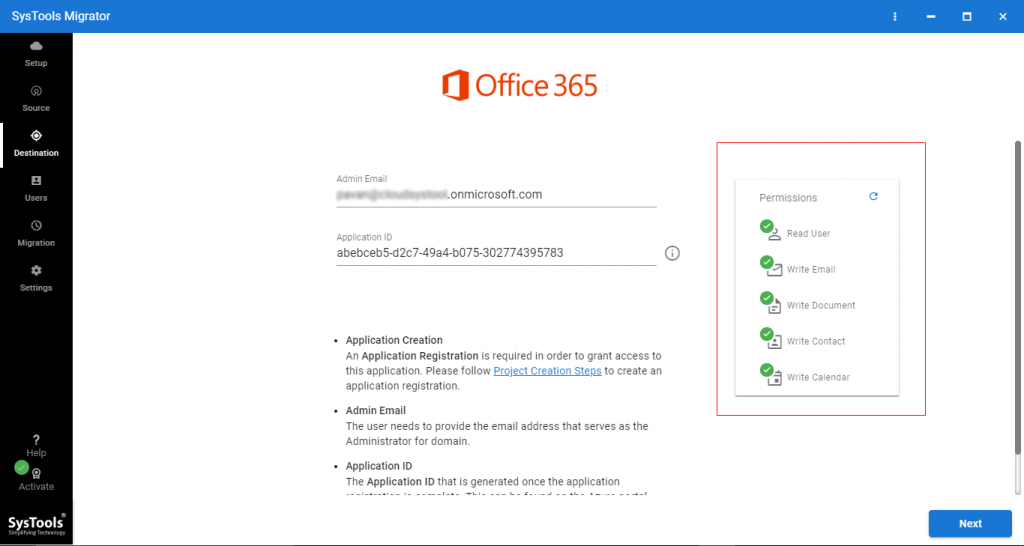
Step 6. Here, enter destination Office 365 tenant Admin ID & Application ID, then click on the Validate button.
Step 7. Once permissions are validated click on Next.
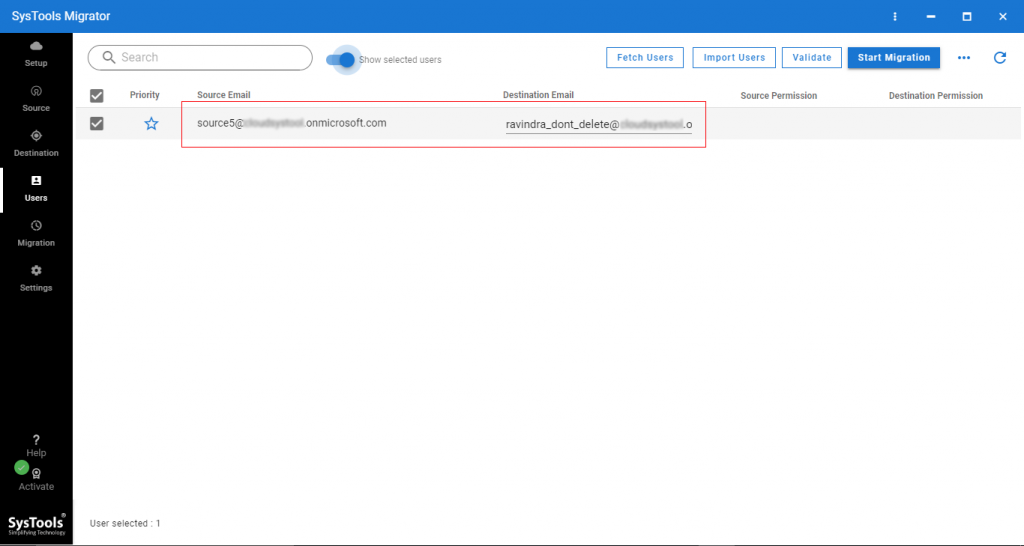
Step 8. Now, create a mapping between source & destination users. To do this job tool provides three options – Fetch Users, Import Users, and Download Template. Select any one option to create a mapping between users for migrating from one O365 tenant to another.

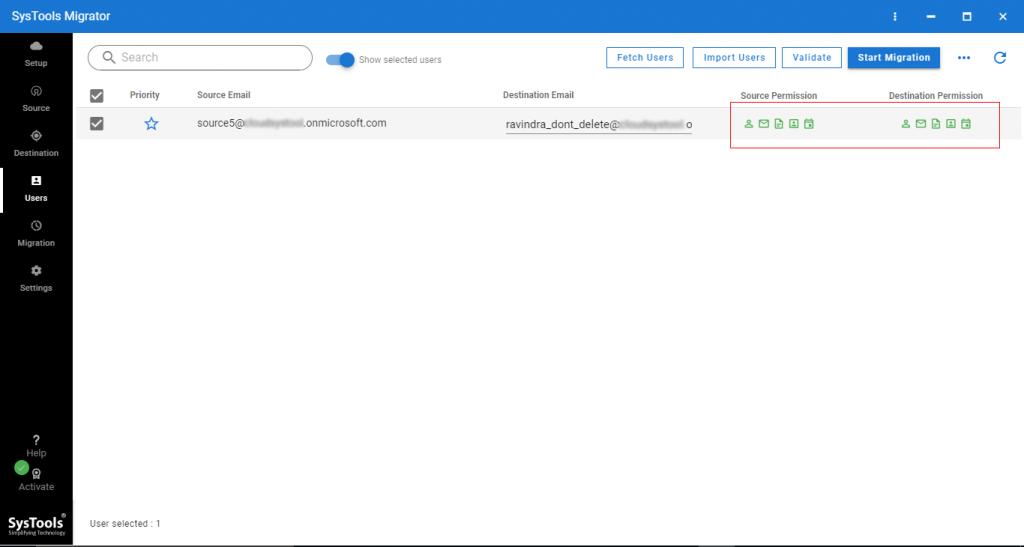
Step 9. Once the mapping is created you can see the source & destination user’s email ID, now click on the Validate button to validate permissions.
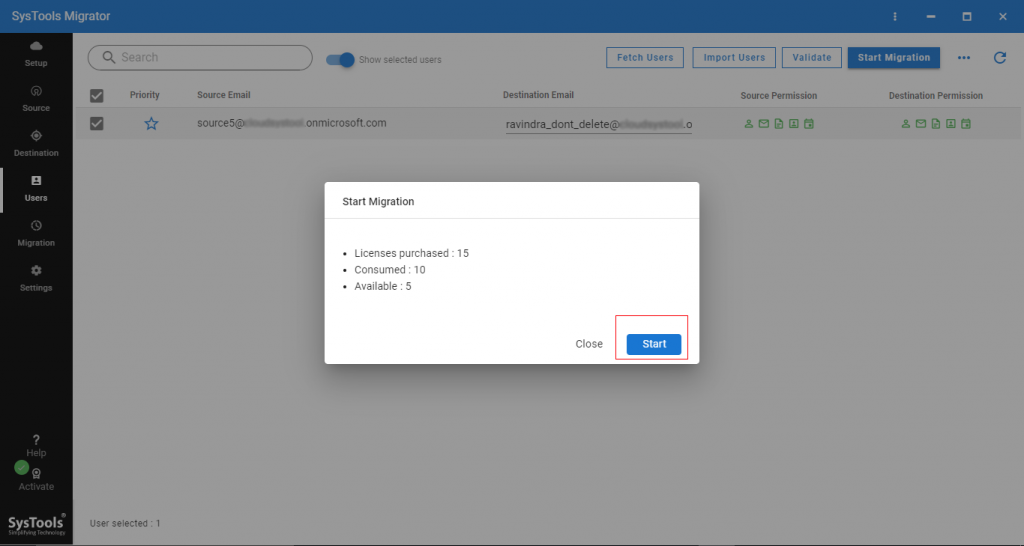
Step 10. Here, permissions are validated click on the Start button to start Office 365 tenant to tenant migration.
Step 11. It also provides a save report option to save migration reports in the local machine.
User Review
I was in a hurry to perform tenant to tenant migration within O365. Then i googled it and found this article, and this tool saved my soul. What I liked the advanced features of this utility, as it allows users to create a user mapping between the source and the destination tenant, moreover the simple interface of this utility makes it easy to use. Me being not aware of much of technical knowledge but with the help of this utility, I have performed this data migration successfully without losing any data. Most recommended tool ever.
Final Words
After considering the scenario, most of the users searching for an Office 365 tenant to tenant migration step-by-step guide. Hence, in this blog, we have explained the different approaches in detail.
Along with this, we have explained the suitable way for the same. It is very necessary to follow all the prerequisites before starting the entire process of migration. Hence, using the above-mentioned tool one can easily perform tenant to tenant migration in Office 365 without any hassle.
You May Love to Know: How to Move Emails From One Office 365 Account to Another? Quick Solution
FAQs
Is any free demo version supported with this tool before purchase I want to check it?
Yes, it provides a free demo version for users to self verify the performance and the working of this utility. Moreover, the demo version can help you in Microsoft 365 tenant migration, for two user accounts at no cost.
How can we migrate the specific data in Office 365 according to a date range?
This is a modern feature-rich tool that offers a date-based filter that allows users to migrate data selectively by applying the desired date range from the workload selection.
Does this utility support Windows 10 OS?
Yes, this software highly supports all the versions of Windows OS such as 10, 8, 7, etc. Thus becomes the one-stop solution for users to perform Microsoft 365 tenant to tenant migration.