Step By Step Process to Migrate Outlook File into Office 365 Cloud


Nowadays, Microsoft Office 365’s popularity is increasing at a rapid pace. Many users who use Outlook for email communication are moving their data to the cloud as it helps in increasing business productivity and many other benefits as well. Therefore, in this article, we will discuss the steps to import Outlook data file to Office 365 using the manual as well as automated solutions.
Two Ways to Migrate Outlook File to Office 365:
Import Outlook Data File to Office 365 Manually
The manual method to import Outlook files (PST) includes the configuration of an Office 365 account in the Microsoft Outlook desktop application. Hence, you must be technically sound to execute this process.
Once, you have successfully configured the account, then also, implement the following steps:
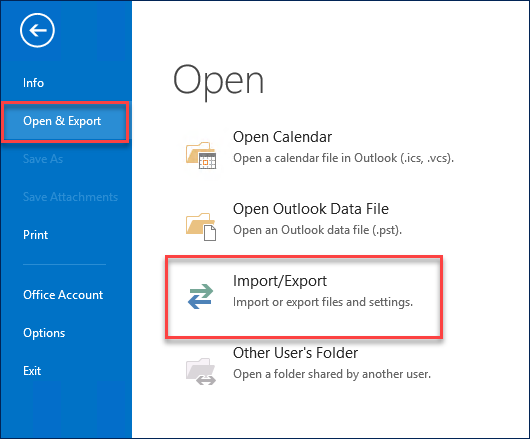
1. Click on File button >> Open & Export >> Import/Export option.
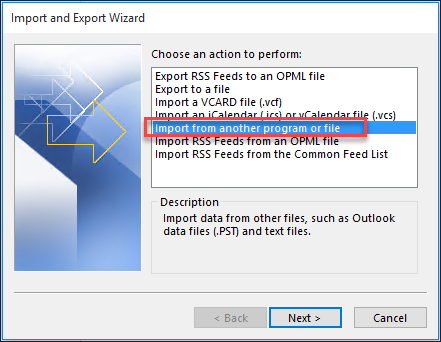
2. Then, choose Import from another program or file option in the wizard and click Next.
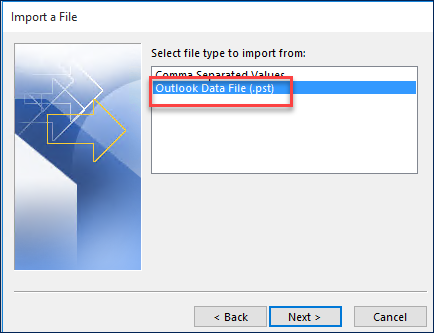
3. Here, select Outlook Data File (.pst) and proceed by clicking on Next button to import Outlook data file to Office 365.
4. Click on the Browse button to locate the Outlook file stored in your system, then hit the Next button.
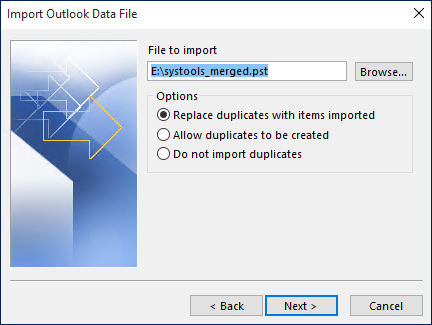
Note: A password prompt will appear in the Outlook data file that is password protected.
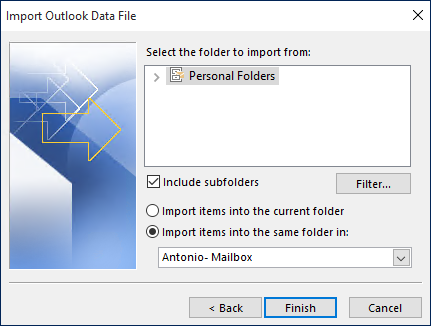
5. Now, choose the folder to import the data files and click on the Finish button to migrate Outlook to Office 365.
Now, Microsoft Outlook will start the synchronization process which might take time depending on the amount of data stored in the file and internet speed.
If there is a large amount of data stored in the Outlook file, then it might take a few hours easily to reflect data in Office 365 cloud.
Also Read: Top Methods to Export Outlook Emails to Thunderbird
Moreover, this method is perfectly suited if the user wants to migrate less than 5 users’ data into the Microsoft O365 account. This is because it is such a time-consuming process and not feasible for Organizations.
Therefore, it is recommended to go for the automated application mentioned below to transfer various Outlook data files securely.
Migrate Outlook File to Office 365 Account Effortlessly Using Software
To simplify the entire process and reduce time consumption, it is highly recommended by experts to opt for an automated tool i.e. PST to Office 365 Migration Tool.
This software enables users to migrate the ‘N’ number of Outlook files without any configuration process into O365 accounts. Moreover, it makes the complete process quick and efficient and reduces risks of human error as well.
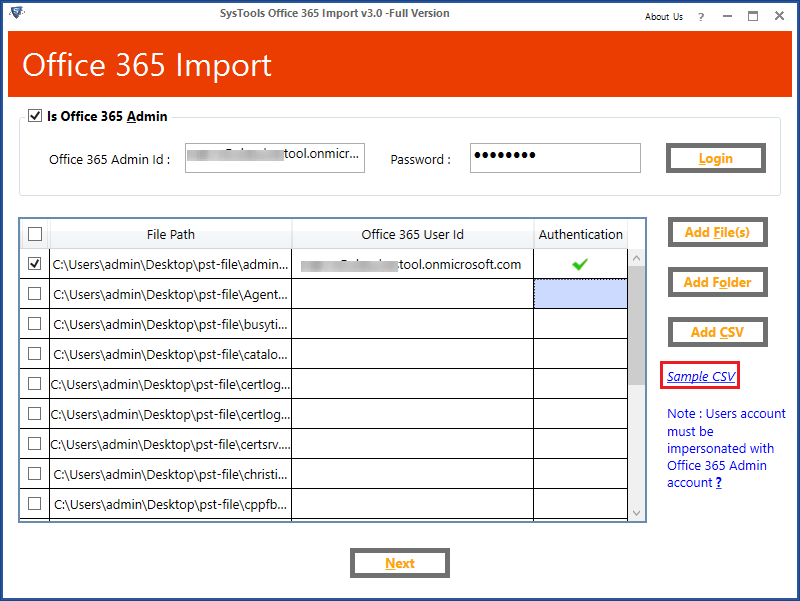
1. Run the software as “Run as Administrator”.

2. Provide Admin or User credentials to log in to Office 365 account to import Outlook data file to Office 365.
Important Note: If you log in using Admin credentials, check the “Is Admin” checkbox. Using the Admin account allows users to migrate files into multiple Office 365 user accounts. Whereas, if you are using User credentials, then you migrate Outlook file into your Office 365 account only.
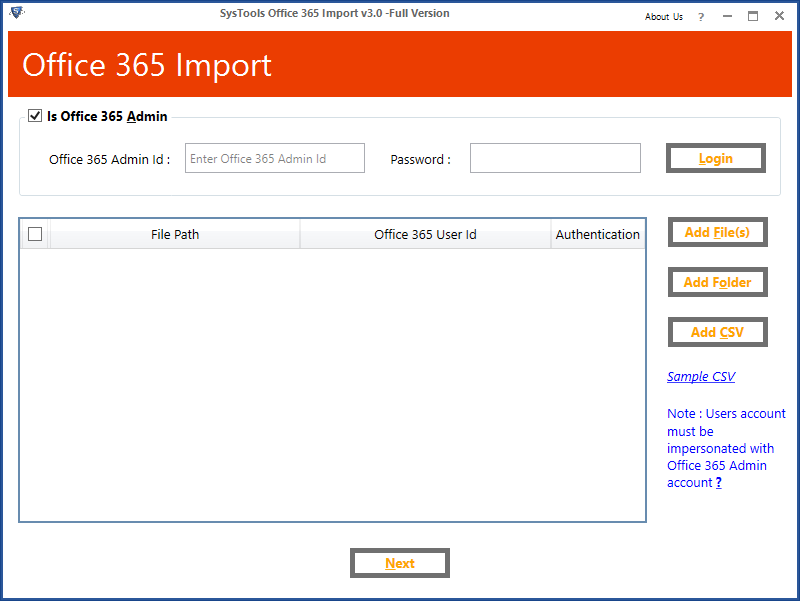
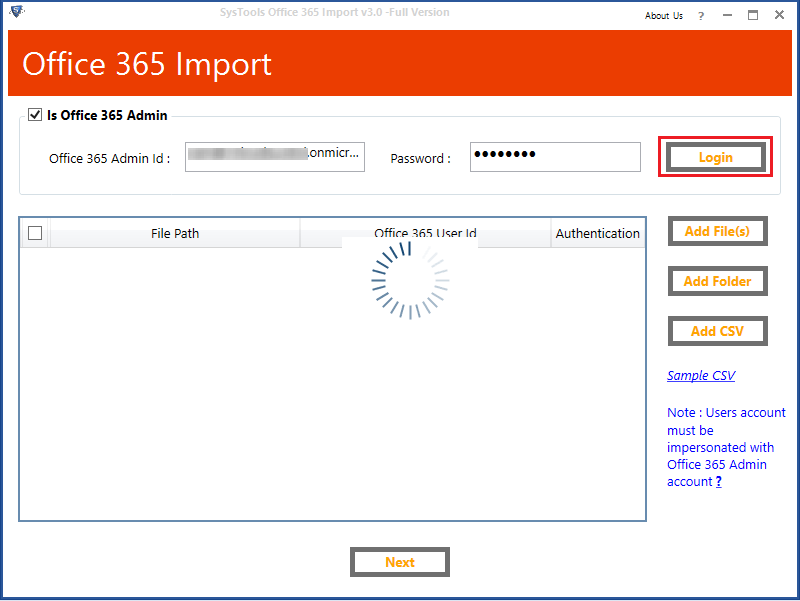
3. Enter Office 365 User ID and Password and then click on the Login button to migrate Outlook to Office 365.
4. Click on Add File(s) option to add Outlook single or multiple files or select Add Folder option to add a complete folder containing Outlook data files.
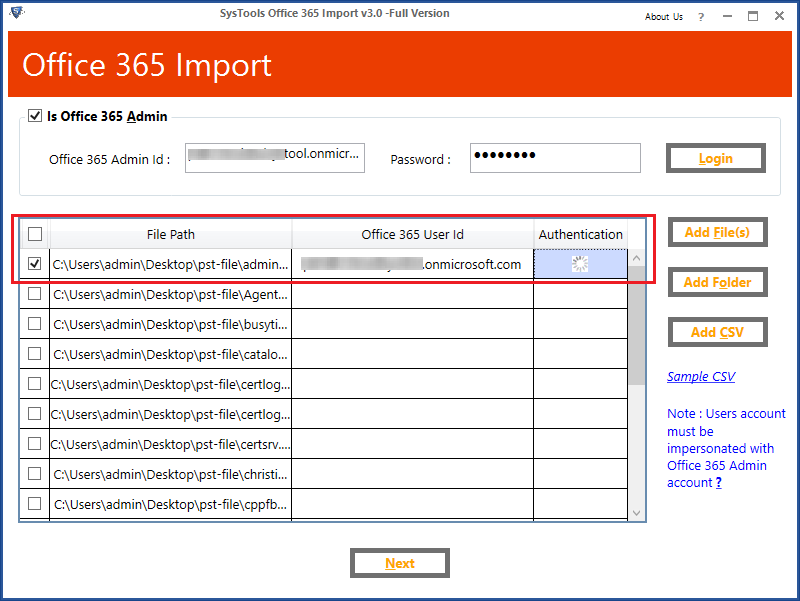
5. After adding Outlook files, mention Office 365 ID corresponding to the file name to migrate the file into the desired O365 account.
6. You can select the mailbox items that you want to export. You can check/uncheck the checkbox corresponding to Mails, Calendars, Tasks, and Contacts to do this.

7. Check the “Attach Outlook PST File” checkbox if you want to create a new folder with the Outlook data file name.
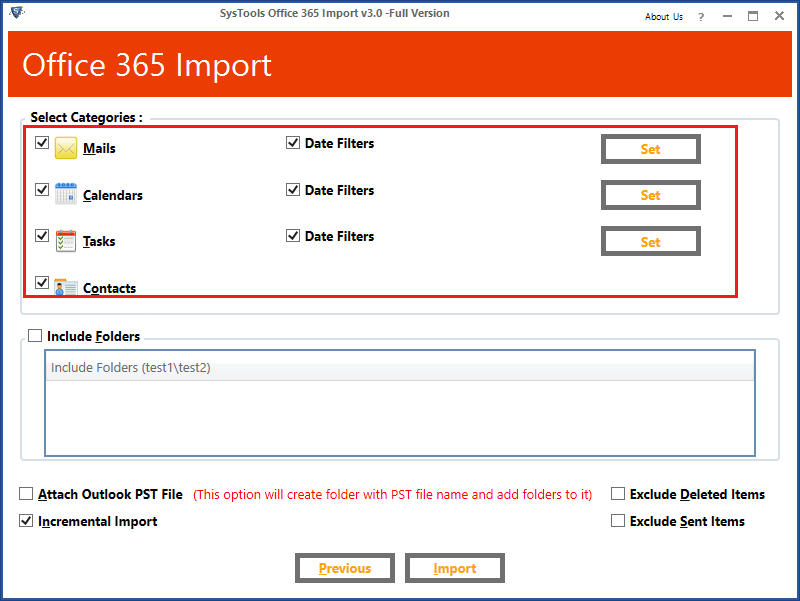
8. If you previously implemented the migration process using this software, then you can enable the “Incremental Import” checkbox to initiate migration from that point.
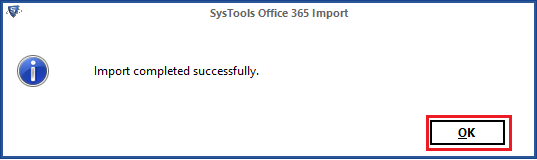
9. Click on the Import button to start the process.
10. Click the OK button once the process to import Outlook data file to Office 365 is completed.
Conclusion
Data migration from a local system to the cloud is always a tricky process. Users who don’t have proper technical knowledge can face serious problems while implementing the steps. Therefore, we have mentioned a reliable application to import Outlook data file to Office 365 mailbox.
Organizations that are looking for a quick and efficient solution to carry out migration can opt for this utility. Moreover, it can help them save a lot of time and effort which will not impact the workflow of the organization.