How to Migrate Exchange 2013, 2016 Mailboxes to Office 365 – Comprehensive Guide
Office 365 an email client based on the cloud by Microsoft was launched to provide Exchange online services. Solutions to switch from on-premise email applications to Exchange online is the requirement of a majority of organizations. It is not easy to perform such a switching operation because a lot of expertise along with time consumption is high.
5 Easy Steps to Migrate Exchange 2013, 2016 to Office 365
- Step 1. Download and Install the Tool on Computer.
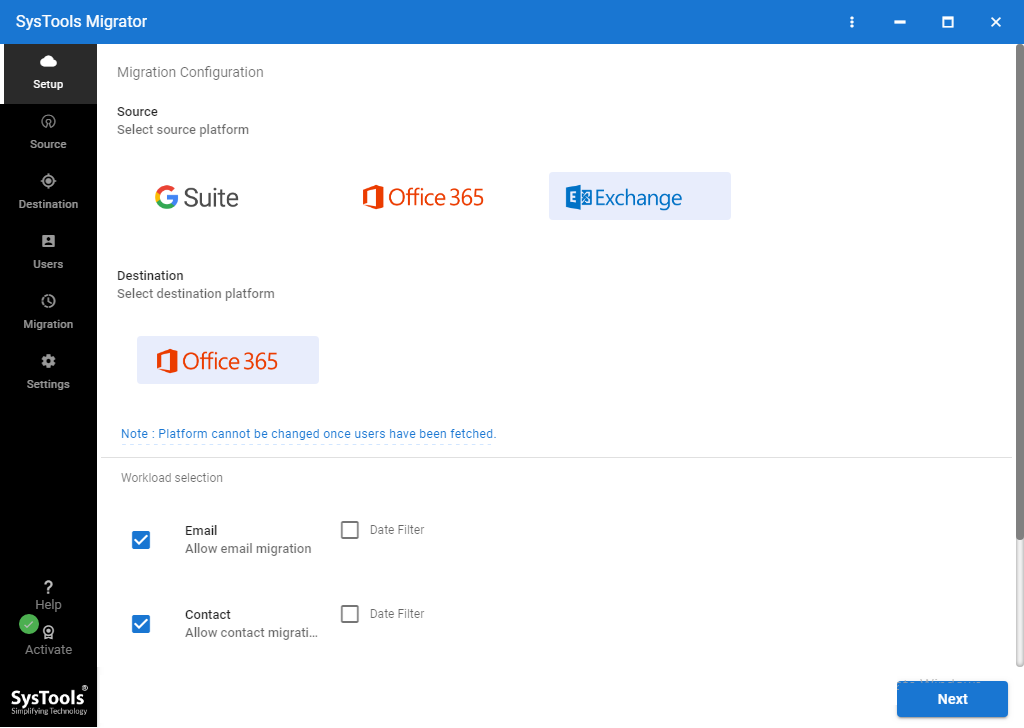
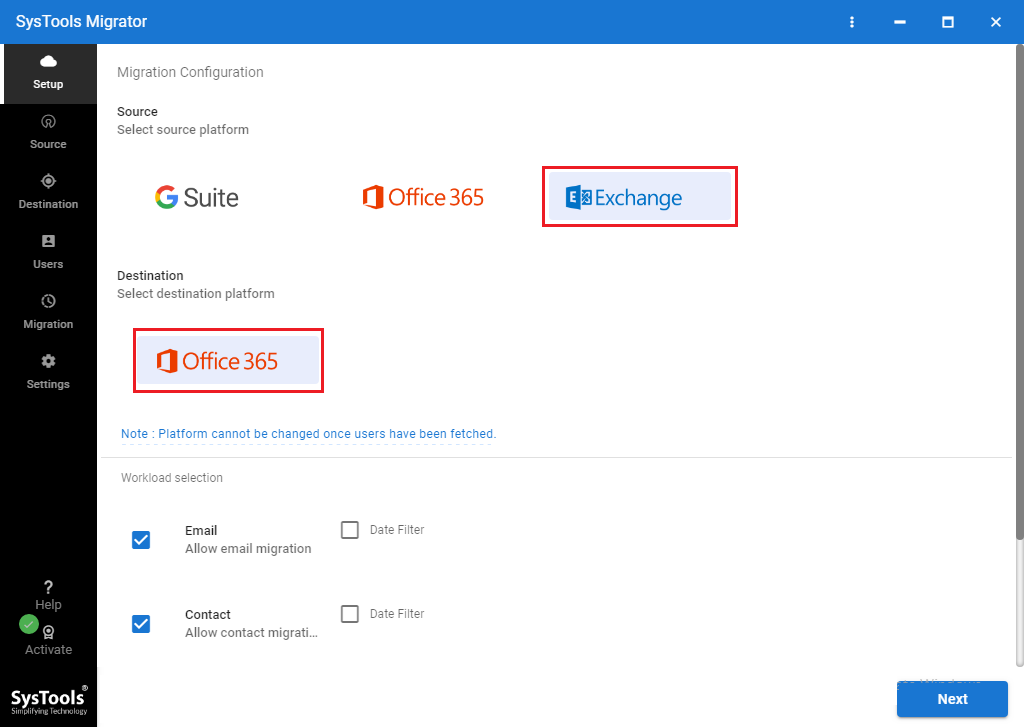
- Step 2. Opt Exchange & Office 365 as Source & Destination.
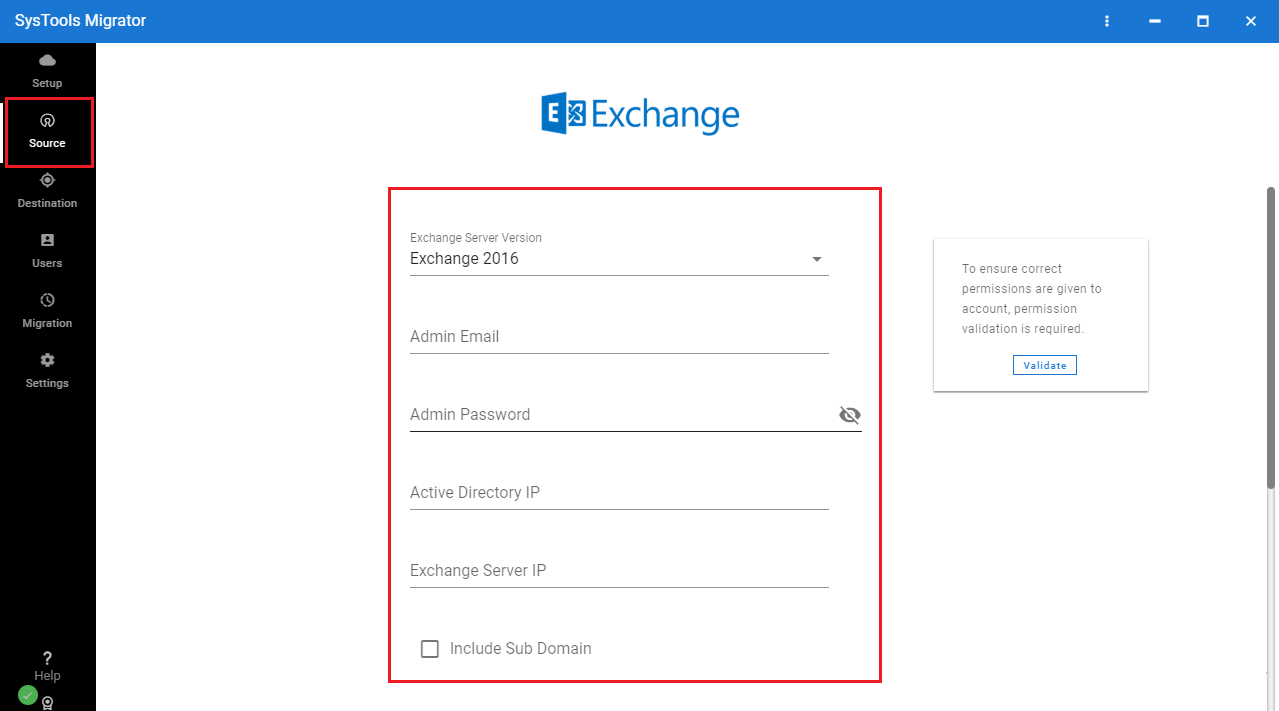
- Step 3. Use Exchange & Office 365 Admin Credentials to Login.
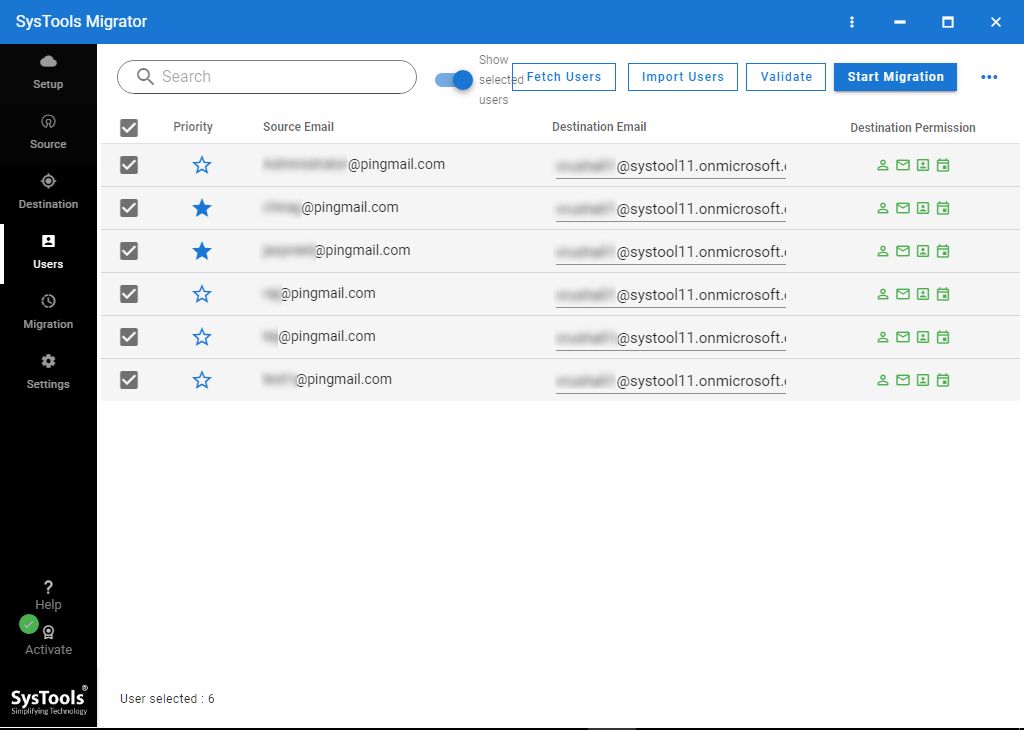
- Step 4. Create Mapping Between Source & Destination Users.
- Step 5. Validate Required Permissions & Hit Start Migration.
Hence, we are providing complete knowledge about why and how to migrate Exchange 2013, and 2016 mailboxes to Office 365 step by step.
Two Ways to Migrate Exchange 2016, 2013 to Office 365
What are the Reasons to Migrate Microsoft Exchange 2013, 2016 to Office 365?
Handling and controlling files on the Exchange server has been one of the major reasons for migration. It is always difficult to handle and control Exchange mailbox data on the local machine for the end-user. The problem of server maintenance cost has become a challenge as one tries to provide excellent performance to its users which adds to the already present problem. Various benefits are provided to end users after they switch to Exchange Online from an on-premises server environment among them some are listed below:
- More availability is supplied by Microsoft Office 365 to users without any infrastructure expenditure. Email accounts are purchased for new clients while the rest is easily managed by Office 365.
- O365 is a cost-effective email client as it provides maintenance-free service while being available whenever and wherever required.
- Office 365 users need not worry about data loss or system failure due to unavoidable disasters or faults as high security of data on Microsoft cloud is provided.
Best Solution for Exchange 2016 / 2013 to Office 365 Migration
There are tools available that are well-designed and built only for this purpose. Exchange to Office 365 Migration Tool is one such tool to migrate Exchange On-Premise to Office 365 that works fine and performs the task in an efficient way. Moreover, it is a professional application that can export emails, contacts, and calendars without any data loss.
Some Top Features of the Tool:
1. Batch Migration – The best feature of the application is that it allows users to carry out the migration task in batches. Users can add all the users in one go and migrate Exchange 2013 to MS Office 365 in batches of 20 users at a time. Moreover, this makes the entire task quick and efficient.
2. Migrate Sub-Domain Users’ Data Also – There is an additional feature within the tool using which users can migrate the data of sub-domain users as well. This provides a lot of ease to Exchange admins who can transfer all the users using this application only. This is an optional feature, so users can enable or disable it whenever they want to.
3. No Mailbox Size Limitation – This software to migrate Exchange 2016 mailboxes into Office 365 accounts do not impose any mailbox size limitation during the process. No matter if there are small-sized Exchange mailboxes or large-sized, the tool makes sure that the entire data is migrated without affecting the data integrity.
Also Read: How to Migrate Mailboxes from One Office 365 Tenant to Another; Guide to Follow
Software Working Steps to Migrate Exchange 2013 and 2016 Mailboxes to Office 365 Cloud
Step 1. Download and Install the above-mentioned Tool.

Step 2. Select Exchange as Source & Office 365 as a Destination Platform from the workload selction.

Step 3. Enter source Exchange & destination Office 365 Admin Credentials and validate the required permissions. Click on Next.

Step 4. Create Mapping between the Source & Destination Users & Validate the required permissions.

Step 5. Lastly, hit the Start Migration button.
Customer Reviews for the Tool
Our organization is considering switching platforms from Microsoft Exchange but is unable to obtain reliable tools. After doing some research and reviewing the review of the app on various sites, I got the best Exchange to Office 365 migration tool. This is the perfect solution we have been looking for and helped us easily migrate more than 1,500 users.
Currently, there are many third-party utilities available for migrating Exchange mailboxes to Office 365 accounts. However, all these applications are unreliable because you cannot use the utility to export important data. Therefore, we chose the professional software over other for migrating data from Exchange 2013 server to O365 cloud. Moreover, you also have the option to select/deselect the categories you want to transfer from your Exchange account.
We chose this tool because of its extensive features. The favorite feature of this tool is that you can migrate 200 mailboxes at a time, making the whole job easier. Moreover, if data items fail during the migration process, when you rerun the migration, the tool will try to export these items again without creating duplicates
Migrate Exchange 2016, 2013 to Office 365 Using Hybrid Migration Step by Step
Performing migration of data from the Exchange 2013, 2016 mailbox to Office 365 account, a solution is provided to users known as Hybrid Office 365 migration. With the aid of such techniques ability to perform migration and switching is available to the user. It is a five-step process for migrating an Exchange server. The step-by-step scenario is listed below for Hybrid Migration:
Step #1. Discover a Migration Endpoint
First step first as the user is required to determine Exchange remote migration endpoints. These endpoints contain the on-premises Exchange server connection settings, that is those that are currently accessing the MRS proxy service which is required for the automatic migration process.
Step #2. Open the MRSProxy Service
In case, on your Exchange 2013 on-premises client access servers the MRSProxy service is disabled then, the below-given instructions are required to be followed in the Exchange admin center (EAC):
- Start Exchange-Admin Center and then go to Servers (section) -> Virtual Directories
- Now under Client Access Server select the EWS directory and click on Edit a small pencil icon
- Find the checkbox of MRS Proxy and mark it to activate. After that Save settings so that changes made are saved on the server.
Step #3. Move Mailboxes by Using Exchange Admin Centre
Following instructions should be followed to migrate Exchange 2016, 2013 to Office 365 account while on-premises processing:
- Start the Exchange-Admin Center and then go to Office 365 -> Recipients -> Migration
- Click on Add (+) option and then choose Migrate to Exchange Online
- Click on Remote move migration in the migration type page and click Next
- On the current screen, click on Add (+) button to highlight a user on-premises to migrate data to Office 365.
- Click on Add (+) -> OK -> Next to proceed further
- Mention required details on the credential page, for an on-premises administrator including password and name, and click on the Next button
Note: A confirmation page will pop up after it successfully discovers migration endpoints.
- A confirmation page for confirming the migration endpoint opens for verifying the on-premises Exchange server FDQN, Click Next to continue.
- In the required text field mention the migration batch name and search and select the target delivery domain by operating the down arrow for the mailboxes migrating to Office 365. It is the generally used basic SMTP domain for O365 mailboxes.
- Take a look that moves primary and archive mailbox options are enabled and hit Next to continue.
- At least one recipient must be chosen from the current page. A complete batch report can be received.
- Automatically start the batch option should be enabled and then mark the option for automatically completing the migration batch. Click on the New button to proceed to the next step.
Step #4. Eliminate Completed Migration Batches
Completed batches of Exchange 2013, and 2016 to Office 365 migration procedure are recommended to be deleted for minimizing errors likelihood. Follow the below-mentioned instructions to do so:
- Open EAC and select Office 365 -> Recipients -> Migration
- Select the completed migration batch to delete it.
- A confirmation dialog box for deletion will appear and then click on Yes for the completion
Step #5. Set the Offline Mode of Outlook on The Web
Users can access their mailboxes even in absence of any network by enabling offline mode in OWA. One needs to reset the settings of offline access in their web browser for using Outlook on the web in an offline state.
Step #6. Confirm Exchange to Office 365 Migration
After completion of all the above steps, users need to see whether the procedure worked or not. The successful completion will indicate that migrating mailboxes is done as per requirements.
Since the process migration gets completed after a certain time duration, therefore, you can verify working by opening EAC and going to Office 365 → Recipients → Migration to see the status of the procedure.
If you found Status as Syncing then it means that the process is still going on and if it is Complete then it means that Exchange 2013, 2016 to Office 365 migration is successfully completed.
Note: Step (6) is not a part of the migration procedure. It is an additional procedure to check whether migration is performed successfully or not.
Important Note: Read this article to migrate Offline Exchange 2010 mailbox to Office 365
Conclusion
In this article, we have provided you with a manual migration approach and automated tools by which one can easily migrate Exchange 2013 / 2016 to Office 365 step by step. As the above-mentioned software solutions can work within the company budget and the time frame. Furthermore, If in case of any problem is raised throughout the process of migration, comment below in the comment section as we are here to help you.

