Import PST Mailbox to Exchange 2013 Server – Tips and Tricks


To import PST Mailbox to Exchange 2013 / 2010 Server, two methods namely, PowerShell Command and EAC (Exchange Admin Center) method exist that help to move the PST Mailbox to Exchange 2010 Server. The professional approach in Exchange 2010 environment to migrate PST Mailbox is to go with the automated software like Exchange Import. The utility offers many distinct features which make it different from other products.
There are many mailbox items like emails, contacts, calendars, notes, journals etc. There can be various professional mailboxes of any user. Whenever a user tries to migrate the PST Mailbox to Exchange environment with EAC, entire data will be moved but, it will result in increased size of the mailbox. In case of PowerShell, a user can specify the folder data to be imported but cannot specify the desired data in the selected folder, only to be imported.
The following user query will make the problem more clear
Query
“I am trying to import my mailbox items from a PST mailbox to my Exchange mailbox. I am using the PowerShell command to do it but, it is continuously throwing the error message. Does anyone have the idea why is it happening? Also, please tell me any reliable and efficient tool to import PST Mailbox to Exchange 2013 environment. Any help or suggestion would be greatly appreciated.”
From the above query, the problem analyzed is, either the user is not providing the right PowerShell command or the permission to Import process is not given to the user.
The solution to the above query has three different approaches:
- Exchange Admin Center (EAC) method
- PowerShell Command
- Efficient tool
The approaches are discussed below with their demerits (if any)
EAC Approach to Import PST Mailbox to Exchange 2013 Environment
In EAC method, the user need to follow the below steps to move PST mailboxes to Exchange environment
- Launch Exchange 2013 Server EAC with Administrator credentials
- Go to Recipients >>> Mailboxes >>> More (…) >>> Import PST.
- An Import PST wizard pops-up. Specify UNC file path with name of PST file.
- Browse the mailbox to store imported PST file and proceed the Next button.
- Check the Checkbox to get Import Process completion notification mailed to user. Browse recipients and click Finish button. A notification pops-up when the process is completed.
Demerits on EAC method to Import PST Mailbox to Exchange 2013
The drawbacks of the EAC method while importing PST mailboxes to the Exchange environment is provided below:
- Only one PST mailbox imported at a time
- The whole PST mailbox imported. No choice for specific folder or data import, resulting in the increased mailbox size.
- Permission required to perform Import process
Some of the demerits of EAC are resolved through the PowerShell command method. Just take a look at the process of PowerShell Command in Importing mailbox from PST into Exchange Servers.
Approach to Move PST Mailbox to Exchange 2010 / 2013 Server – PowerShell command
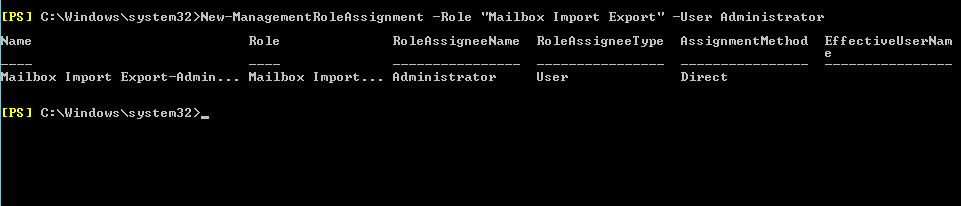
Provide Import permission to the user to perform the import process. Execute following command to provide import permission
New-ManagementRoleAssignment –Role “Mailbox Import Export” –User {User_name}
Ex: New-ManagementRoleAssignment –Role “Mailbox Import Export” –User Administrator
Now, execute below cmdlet to import PST Mailbox to Exchange 2013 environment
New-MailboxImportRequest -Mailbox “User_Mailbox-Name” -FilePath “UNC_shared_File_Path”
Ex: New-MailboxImportRequest -Mailbox Administrator -FilePath \\EX16\PST\outlook3.pst
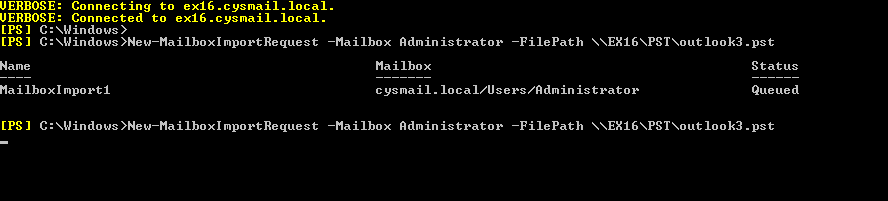
In this command, the PST file named outlook3.pst is imported to Administrator mailbox
Note: In case, you need to add the PST mailbox into any of the sub-folder of the user mailbox, then execute the below command:
New-MailboxImportRequest -Mailbox “User_Mailbox-Name” -FilePath “UNC_shared_File_Path” -TargetRootFolder “Folder_Name” -IncludeFolders “Inbox Calendar Contact”
Ex: New-MailboxImportRequest -Mailbox Administrator -FilePath \\EX16\PST\outlook3.pst -TargetRootFolder pstfile -IncludeFolders Inbox

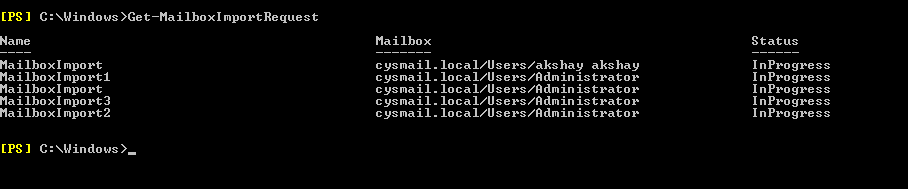
To get status of the Import process, execute the below command
Get-MailboxImportRequest | Get-MailboxImportRequestStatistics
Drawbacks on PowerShell Command
There are some disadvantages on using PowerShell command while importing PST Mailbox into Exchange 2013 environment:
- Requires technical knowledge regarding Exchange Management Shell commands and Exchange server
- Time-consuming process
- Errors might lead to loss of data
- There are chances that the PowerShell cmdlet New-MailboxImportRequest failed to import the Outlook PST file to Exchange Server
Having an advantage over some demerits on EAC method, Powershell command also has some drawbacks in which some are taken down by EAC, but not all. Hence, to overcome all the limitations by the two methods, a user can move to a better efficient solution to efficiently move Mailbox from PST to Exchange 2010 Server
Efficient Tool to Import PST Mailbox to Exchange 2013, 2010 Server
The professional solution to save the Outlook Mailbox in the Exchange Server is to use the third-party tool i.e. Exchange Import tool. This utility allows users to import the multiple Outlook data file to the Live Exchange Server 2016, 2013, 2010, 2007, & 2003 mailboxes in a simplified manner. Users can also selectively import PST file to the selected Exchange Server version.
Download Now Free Purchase Now 100% Secure
The software provides date filter option which imports the selected Outlook PST file in a specified date range. For this users have to specify the “from” & “to” for the date range. Users can selectively select the PST file items such as: mails, notes, tasks, calendars, journals, contacts, and import directly to the Exchange 2013 Server mailboxes and any other version. After importing the PST file the tool generates the complete status report which will shows the complete conversion report.
Key Features Of Automated Wizard
- Import bulk Outlook data file to Exchange Server Mailboxes
- Capable to search and import PST file within the domain network
- To search Outlook PST file on the local network server domain credentials are required
- Provide option to search users in sub-domain while importing PST to Exchange mailbox
- Import PST items: mails, tasks, notes, journals, calendars, contacts into MS Exchange
- Support all versions of Exchange Server and Microsoft Outlook
Steps to Import PST Mailbox to Exchange 2013 Server Mailbox
Step 1: Download, Install and Run the Exchange Import Software in the local system
Download Now Free Purchase Now 100% Secure
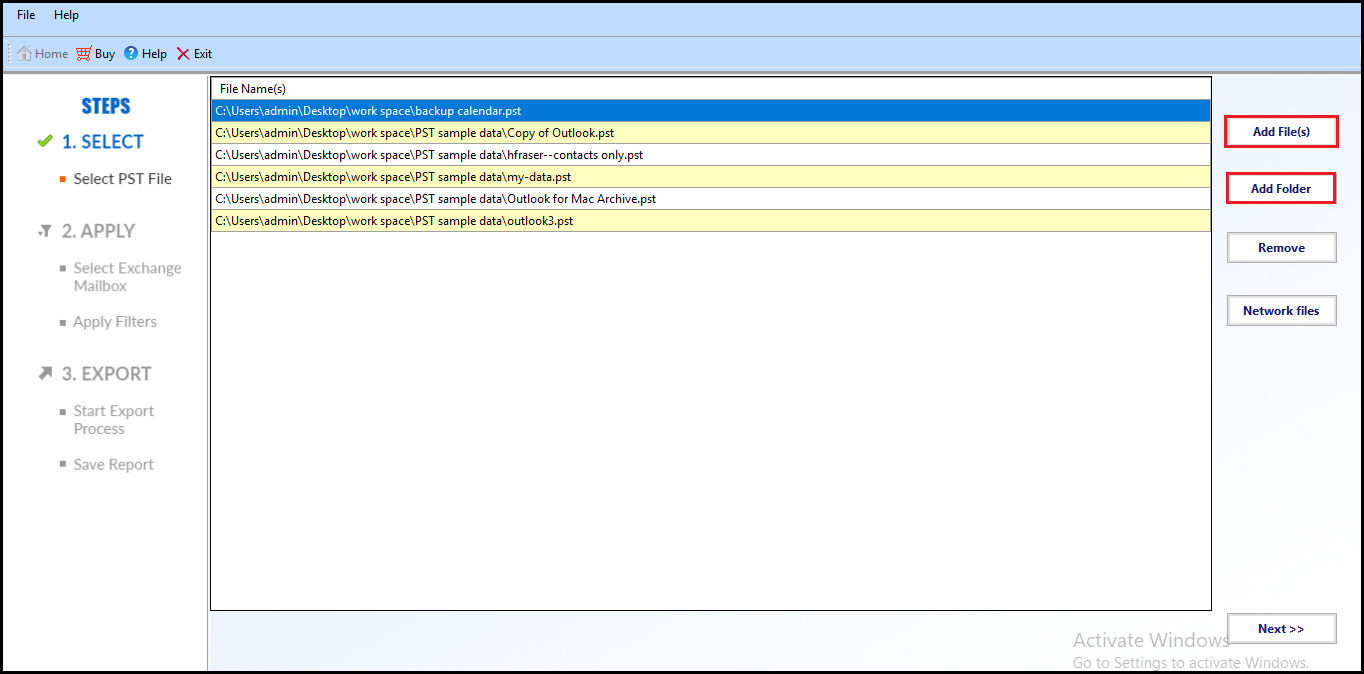
Step 2: On the displayed screen provide the PST mailboxes to be imported and proceed. Two Options are provided to select PST mailboxes:
Add File: Choose only PST files
Add Folder: Choose the folder containing PST files
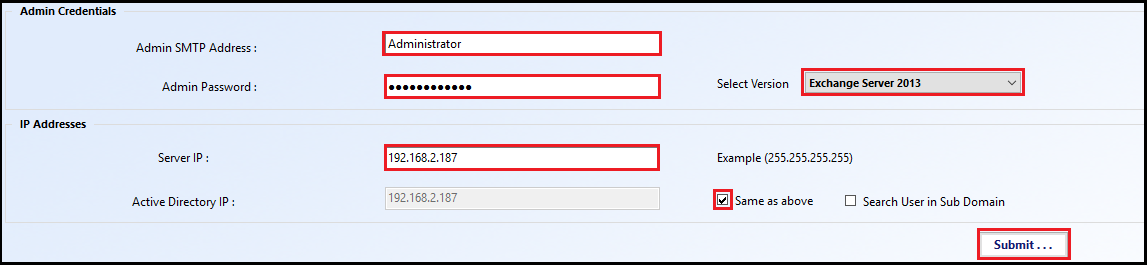
Step 3: Provide Administrator credentials with the Exchange Server version to get access to the utility to efficiently import PST Mailbox to Exchange 2013 environment. Under IP Addresses section, provide Server IP and Active Directory IP.
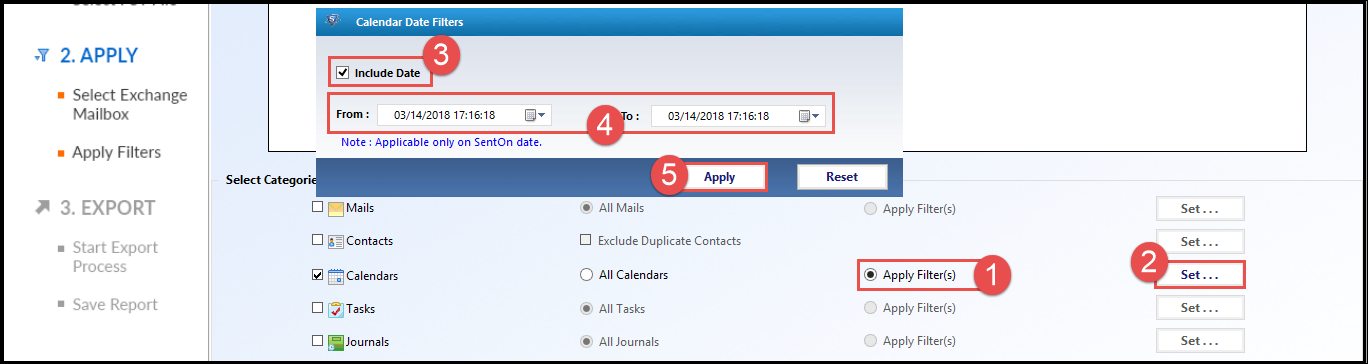
Step 4: Check the Mailbox items that need to be imported. Apply Data Filtering, if required. For that, go to Apply Filters >>> Set >>> Include Date.
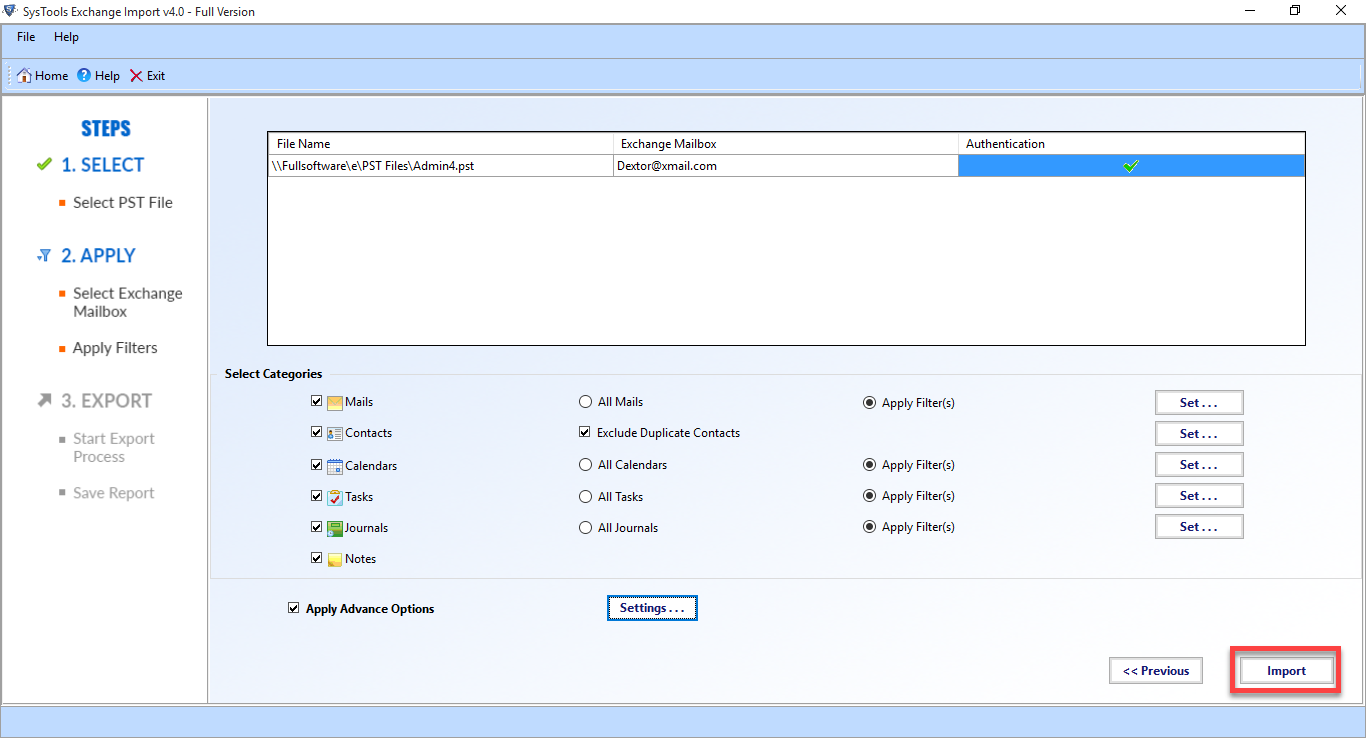
Step 5: Click the Import button to start the Import process.
Finally, view the contents of the imported mailbox from the User Outlook account.
Concluding Words
To import PST Mailbox to Exchange 2013 Server, Exchange Administrator via PowerShell command or Exchange Admin Center But, there are some limitations to these techniques which leads to the search for an efficient solution. Hence, try an Automated solution that imports PST file to the user mailbox in Exchange 2013 environment. The user interface of the tool is so simple that even a novice user can use it without any problem.