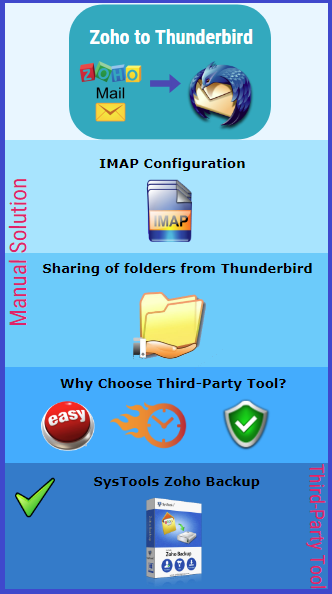
How to Add Zoho Mail to Thunderbird In a Seamless Way


To connect Zoho Mail with Thunderbird, a user needs to perform the conversion from Zoho to Mozilla Thunderbird. In this post, you will learn how to add Zoho Mail to Thunderbird. The approaches discussed here are easy and efficient.
Nowadays, email applications are the most common and important medium for exchange of data. The functionalities provided by the email clients helps the user to transfer the data with ease. There are two such email service providers: Zoho Mail and Thunderbird. Zoho Mail is a web-based online office suite which provides its user some of the distinct features like email communication, document collaboration, etc.
Related Blogs:
Add Zoho Mail to Thunderbird – IMAP Configuration
Follow the given set of instructions to enable the IMAP access to configure Zoho mail in Thunderbird:
1. Login to your Zoho Mail account. Navigate to the Settings tab. Then, click on Mail accounts >> IMAP Access >> Enable IMAP Access
2. Open the Mozilla Thunderbird application on your system
3. Switch to the Menu bar. Then, select the options Tool followed by Account settings.
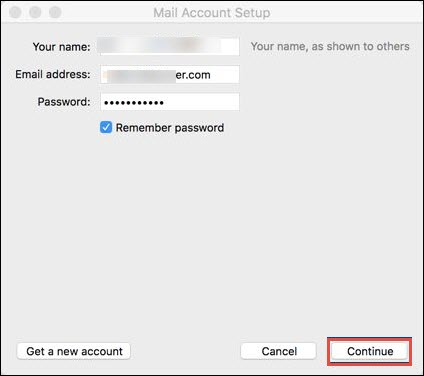
4. Account settings window will open up on the screen. Choose the option Account actions and then press on the button Add Mail account
5. Once you have filled all the required information, click on the button Continue
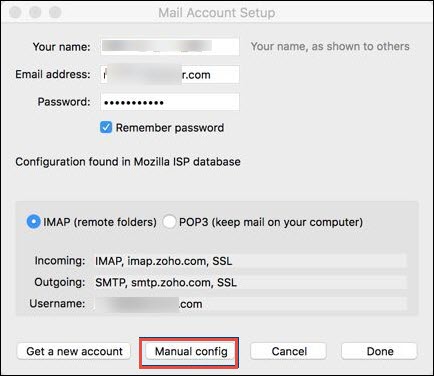
6. Server details of the Incoming and Outgoing Zoho emails are obtained by the Mozilla Thunderbird. Also, the server details can be modified with the help of manual config button
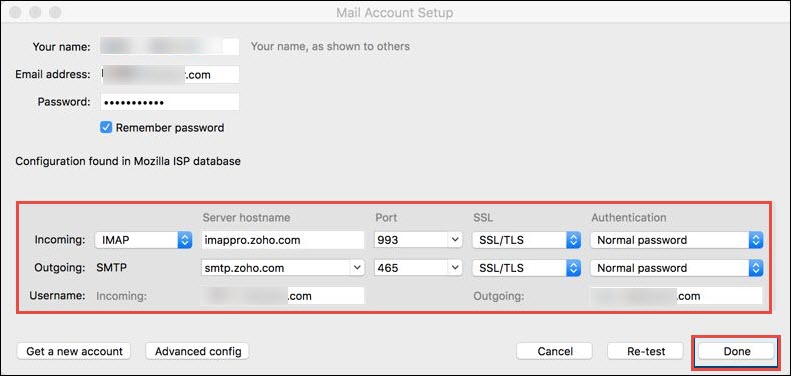
7. In next step, specify the Server and Account details. To do this, follow the given set of instructions:
- Mention details of the Zoho Account in the space provided for entering the details of Email address. In case of the domain hosting, type the domain based email address.
- For the Incoming option, select the option IMAP from the drop-down menu.
#For Incoming Server Hostname
- If you want to add Zoho Mail to Thunderbird for personal use, then mention imap.zoho.com and select 993 as the port number and normal password from the authentication list from the drop-down list.
- If it is for organization user with account type as the domain-based account, specify imappro.zoho.com, choose 993 for the port number select normal password as the option for authentication
#For Outgoing Server Hostname
- Enter smtp.zoho.com. Then choose the port number 465 and select Normal Password for the heading authentication purpose
- In the text field of username, type the complete email address of the Zoho account. In case, you are using any other email address, specify that too.
- Finally, click on Done to generate this account
With the help of above-stated method, users will be able to add Zoho mail to Thunderbird.
Sharing of Folders from Mozilla Thunderbird
Zoho Mail provides the unique feature to the user to share the folders but, only when certain permissions are assigned to the user. This can be done by technique explained in the upcoming section.
Installing ACL Extension
The folder sharing option is also present in Thunderbird IMAP client. Once the Zoho account is added to Thunderbird, users need to share the folders from Mozilla Thunderbird. It can be done just by installing the ACL Extension
1. Select the option of Tools present in the Thunderbird Menu bar.
2. Choose extension from the left-hand side pane and find ACL extension. Install it and then restart the application.
3. After executing the following steps, you will see the extension from the Thunderbird application itself.
Steps to Share the Folders
1. Once the ACL extension has been installed, select the folder which you have to share
2. Right-click on the folder to be shared
3. Choose the options Properties from the various options present
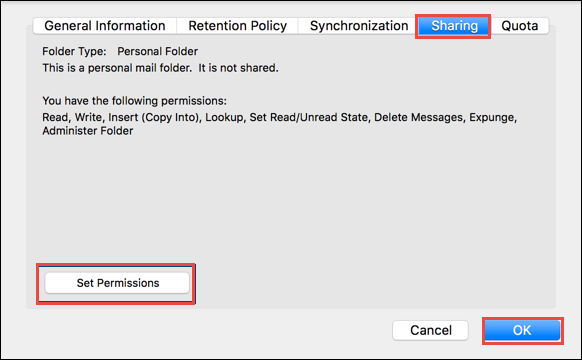
4. Press on the Sharing tab followed by set permissions and then, at last on OK
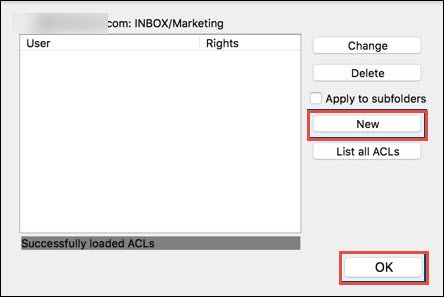
5. New sharing permissions can be added by clicking on New and then press on OK
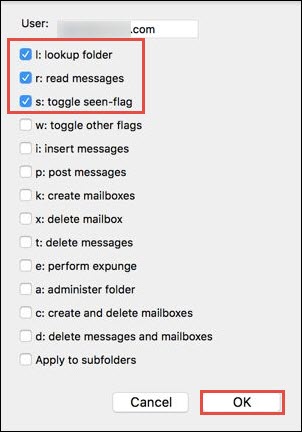
6. Select the desired permissions from the dialog box that prompts on the screen
When a user wishes to grant read permission, choose the following and hit on OK:
- l: lookup folder
- r: read messages checkbox
When a user wishes to grant write permission, choose the following and hit on OK:
- l: lookup folder
- r: read messages
- s: toggle seen-flag checkbox
After performing the above steps:
- The desired folder of Zoho mail will be shared, with the users to whom the permission is granted.
- To view the details regarding shared folder, click on the list of all ACL option.
Alternative Solution: Use Third-Party Tool
The alternative solution to the manual approach is to go with the Third-Party tool like Zoho Mail Migration Tool. According to the experts, it is the master solution to add Zoho Mail to Thunderbird. It yields a very effective result in a short duration of time. The user interface of the utility is so simple that even a novice user can use it without any issue.

The Bottom Line
Sometimes, it is needed by the user to add the Zoho Mail account to Mozilla Thunderbird. The manual techniques have been discussed. But, the manual method is not a good option for the non-professional user. Therefore, a commercial tool is also introduced. This is the best answer to the question how to add Zoho Mail to Thunderbird.