Backup and Restore Windows 7
Backup and Restore is a component of Windows 7 that enables users to create and restore backup. It is successor to the veteran NTBackup utility in earlier versions of Windows that creates backup file (s) and folder (s) on machine.
The Win7 Backup Restore utility supports two types of backup generation: –
File Backup: This includes option for normal backup creation where selected file (s) and folder (s) gets backed up. Another option included here is incremental backup where up-dations to the previous backup are made. The backed up data gets saved into ZIP folder.
System Image: Here, a disk image is created that get saved into a VHD file. This process of backing up database is considered efficient as it is less time consuming because only the changes done to the block of database are updated to the VHD file.
What is System Image and How it Works?
Just consider system image as a snapshot of your hard drive. Instead of a file level backup, here the hard drive blocks are backed up with user and system files, configuration files as well as the software applications saved/installed on the drive. The best part is this image can be used for recovering Windows and its settings if ever the hard drive fails.
The first time when Backup Restore Windows 7 is used, it copies data from hard drive blocks into a VHD file, thereby creating a compact view of the drive on a target storage location. Now, next time when the system image is created, only the updated data is written to the VHD file, and the old data existing on the VHD is moved to Volume Shadow Storage (VSS) area. At the time of backup, VSS services ascertain that no up-dations are done to file being backed up.
How to Create File Backup in Windows 7: –
Step 1: Click on “Start” button and then choose to “Control Panel”.
Step 2: Navigate to “System and Security” and click on “Back up your Computer” link.
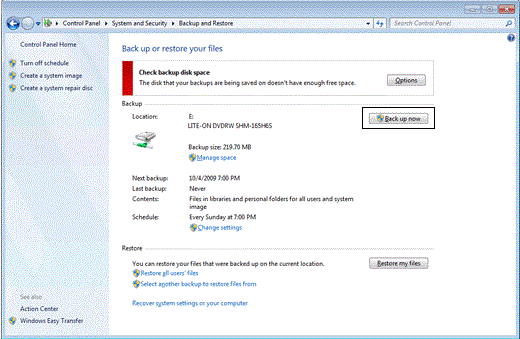
Step 3: Click on the “Back up now” option.
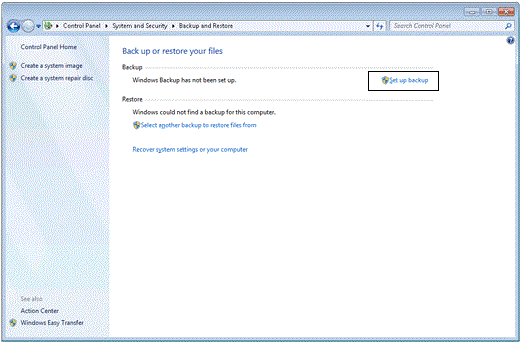
Step 4: If it is the first time that you are creating backup using this utility, click on “Set up Backup” option.
Note: Here, you will be prompted for administrative password, provide it to continue.
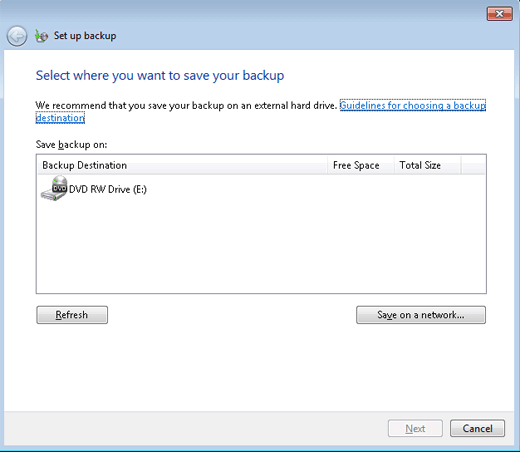
Step 5: Select a location where the backup has to be saved. This can be any system directory, any external storage system (like pen drive, external drive), or the network.
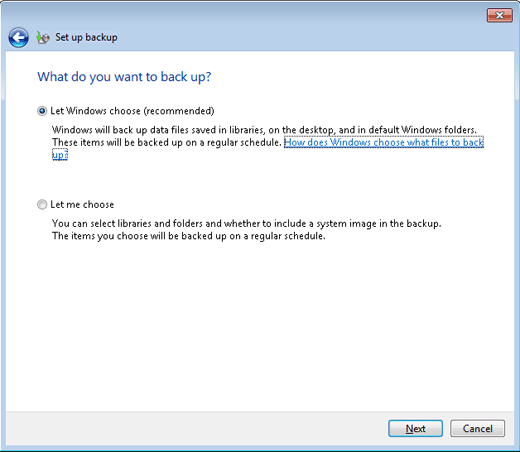
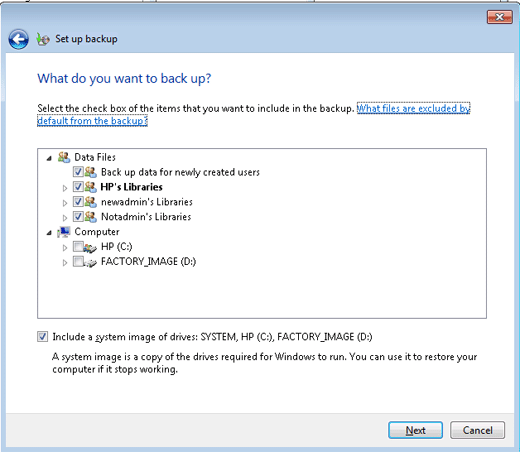
Step 6: Now define what has to be backed up. You can choose “Let Windows Choose (recommended)” or the “Let me Choose” option. If certain file (s) or folder (s) has to be backed up, then it is suggested to select the second option.
If you enable the radio button for “Let me Choose” then following window will pop up on screen:
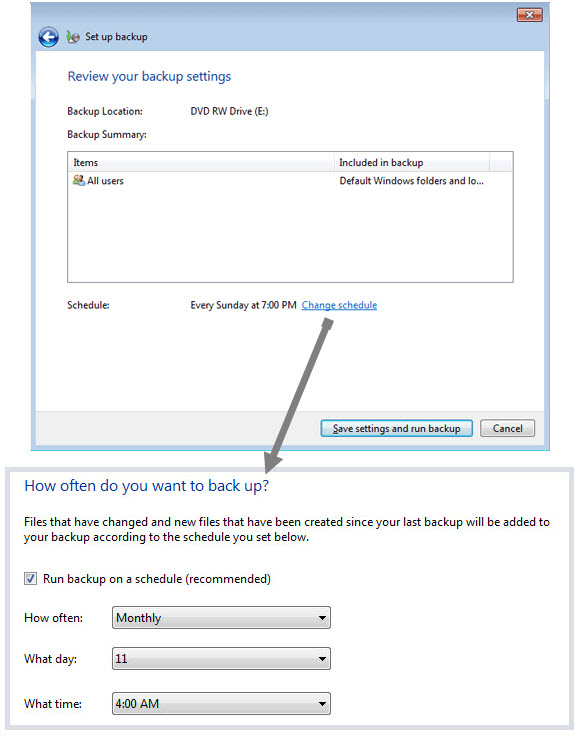
Step 7: Review all the settings. To set backup schedule timings, click on “Change Schedule” option. Once done with this, click on “Save settings and run backup”.
How to Create System Image in Windows 7: –
Step 1: Click on the “Start” button and then select “Control Panel”
Step 2: Under the “System and Security” option, click on “Back up your computer” option.
Step 3: Click on “Create a System image” link at left side of the screen. When you click on this link, the application will look after connected devices to store backup data.
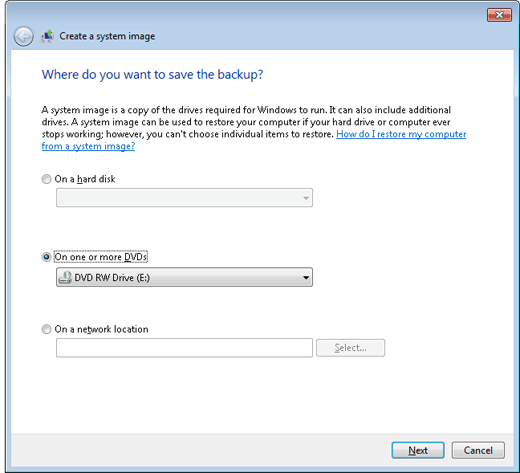
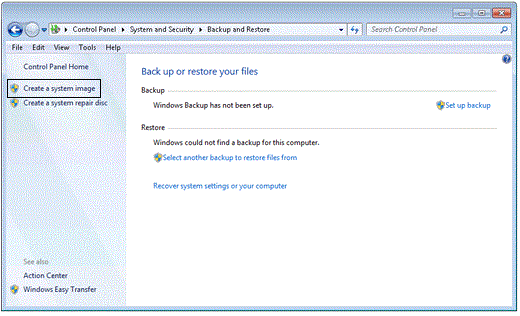 Step 4: Now define a location where you wish to save the system image data:
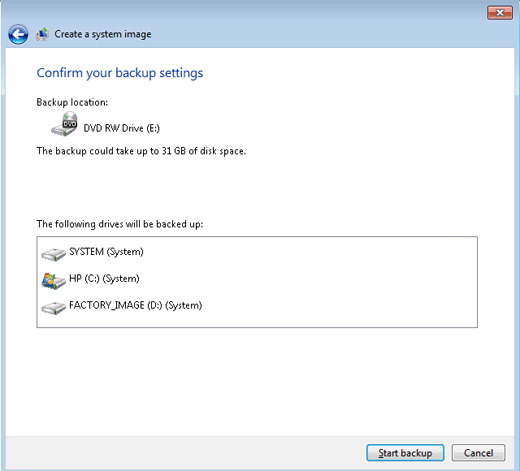
Step 5: Confirm all the settings and click on “Start backup” button.
How to Restore Windows 7 Backup?
Step 1: Connect the external storage device where the backup is stored. Click on the “Start” button and move to “Control Panel”
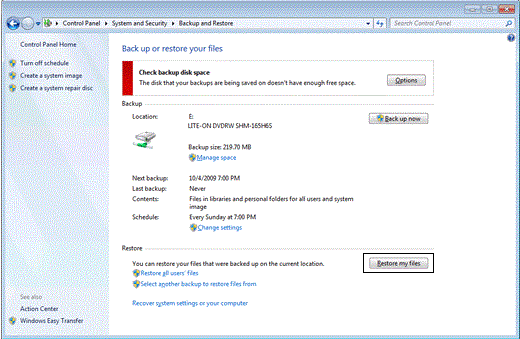
Step 2: Click on “Back up your Computer” option which is available under “System and Security”
Step 3: Now click on “Restore my files”
Step 4: Browse for the file (s) or folder (s) where the backup is being saved. Use the available options to browse the files.
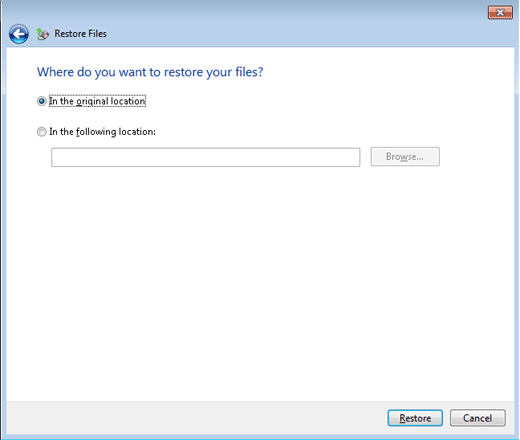
Step 5: Define a location where the backup has to be restored. Either, it can be restored to the original location or an alternate location can be selected.
If the backup has to be restored on different location, click on the “Browse” button to define that location.
Click on the “Restore” button and once the process is complete, click on “Finish” button.
Limitations: –
1: This Windows Backup and Restore system does not support backing up data to magnetic tape drives. Only external drives, DVDs, and alike storage systems should be used.
2: Subfolders of a disk cannot be backed up or restored; instead the application itself creates subfolders.
3: Disk image of drives will be created only if they are formatted with NTFS file system. If a Flash drive is used, make sure that it NTFS formatted.
4: In case of Windows Server 2008, this backup system will not work if the hard drive has sector size more than 4096 bytes else the Advance Format is done for the HDD.
The Backup and Restore feature in Windows 7 is eliminated from Windows 8 and Windows Server 2012. In further Windows editions, Windows 8 and Windows 8.1, File History is added to create System Image Backup and there is no option to create file-based backup like in Backup and Restore tool.


