Recovery of Hyper-V VHD Files with Windows Server Backup Tool


Hello Guys Today I am going to describe the recovery process of Hyper-V VHD files. In the last blog post, we had discussed the ways to perform restoration of Google Apps deleted emails.
As you know that there is already a tool named as Windows Server Backup (WSB) is available, which comes with Windows Server Operating System for performing the backup as well as recovery of all functionalities. It is not needed frequently but when any disaster occurs in Hyper-V or any other functions in Windows Server OS then go for VHD Recovery Software. It’s one of the best ways to overcome that situation. Nowadays there are many different technologies which take care of server downtime, cause this most of Organizations are managing at least one mirror image (replica copy) of their database. If one server goes down or one Hyper-V crashes then Load Balancer automatically manages the redirection and move all user requests to another server.
But, what if when all Hyper-V have crashed cause of hardware failure or any other reason and the server is down now. Then in this situation an Organization will think only about how to get over from this situation but if they have hosted their services on Hyper-V then it is easy to perform recovery of Hyper-V.
Before going for Hyper-V Recovery, it is necessary to install Windows Server Backup tool first. Therefore in below steps I am going to describe about Installation of WSB tool & restoration process of Hyper-V data from VHD file.
Steps to Perform Hyper-V Recovery using WSB
-
- Run Server Manager by going through start menu.
- Now you will see Server Manager Dashboard, click on Manage and then click on Add Roles and Features.
- Now you will have landed on Add Roles and Features Wizard, where you will see all installation steps by which you have to go through. Initially you will at Before you Begin step, just hit the Next button to proceed & keep clicking on Next till you don’t come to the Features Step. See fig 1 for reference of this step.
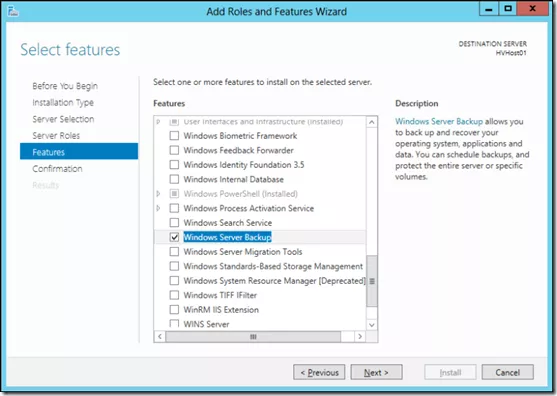
Figure 1: Add Roles and Features Wizard
- Now in Features check Windows Server Backup checkbox and again click on Next button & then click on Install button for installation of WSB tool. You will see installation process now and after completion of Installation just close this window.
- Now we are going for restoration of Hyper-V data from VHD file. For restoration just start Windows Server Backup by typing wbadmin.msc in search box of start menu.
- Then in WSB wizard select Restore and proceed for next step.
- Now you will see a new Recovery Wizard, where you will see the same kind of interface as you have already seen at installation time of WSB tool. Steps for recovery is at left and the process wise steps is at right. In the first step Getting Started, just select radio button A backup stored on another location and proceed. See fig 2 for reference of this step.
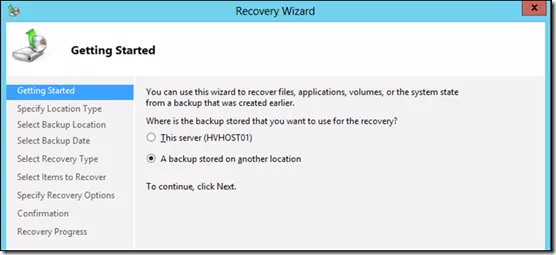
Figure 2: Recovery Wizard
- Now specify location type, just select any local drive in computer or shared folder in network and proceed to next step.
- Now in select backup location locate backup which will be in VHD file format of Hyper-V and then proceed for next step.
- Now select server which you want to recover and then proceed to next step.
- Now select backup date, in this select month, day and time for restoration and then proceed to next step.
- Now in Select Recovery Type select Hyper-V radio button and then click on Next button to proceed. See fig 3 for reference of this step.
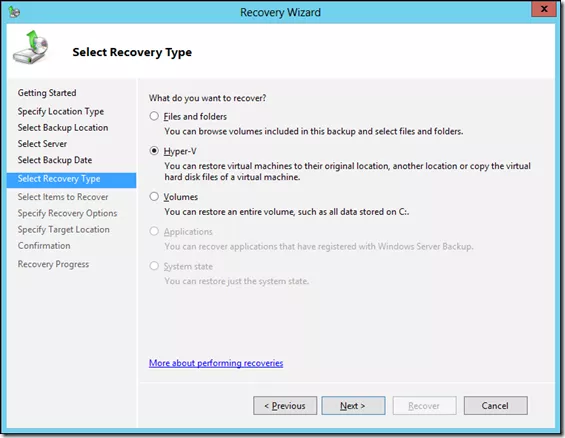
Figure 3: Recovery Type: Hyper-V
- Now in Select Items to Recover, choose a virtual machine for recovering and click on next button.
- Now in specify Recovery Options, select an option according to your need and proceed to next step.
- Now in confirmation step check all items which you want to recover, after being assured about data click on Recover button to start the recovery process.
- Now you will see Recovery Progress and after completion close recovery window.
For confirmation of recovered virtual machine start Hyper-V Manager and look for the recovered virtual machine in the list.
I hope you will get the recovered virtual machine listed after successful recovery.
Restore VHD file Using Hyper-V Recovery Tool
Suppose that the Hyper-V VHD file is heavily corrupted and Windows Server Backup is unable to restore data. Then you may proceed with another Hyper-V VHD Recovery Tool which can solve the corrupted VHD file problem.
The tool provides many advanced features with recovery, some highlighted features are listed below:
- Recovery of all data from VHD file
- Preview all items before recovery
- Allow to search for a file during preview
- Provides you dual scanning mode facility, Quick scan for less corrupted and Advanced Scan for highly corrupted data
- Allow you to save scanning report
- Recovery of dynamic as well as Fixed Hyper-V VHD files
- Recovery of all Versions of NTFS as well as FAT file systems
Conclusion
In this post, we discussed Hyper-V VHD file recovery process using Windows Server Backup tool which is already available in Windows Server. First, we saw all installation process and then discussed the data recovery process from corrupted Hyper-V VHD file. We also discussed an alternate method for recovery using Hyper-V Recovery Software.
In the next post, I will write something new related to data recovery, therefore, keep reading my data recovery blog.